

A biological safety cabinet (BSC) is a critical barrier between biohazards and the people working with them. Whether you're planning a new install or upgrading a school or clinical lab, choosing the right BSC impacts safety, compliance, and operational flow.
This guide breaks down Class I, II, and III cabinets, including A2, B2, and C1 subtypes. You’ll learn when to use each, how they compare to clean benches and fume hoods, and which cabinet works best by biosafety level or lab use case.
We’ve outfitted labs across schools, research facilities, and government projects for 15+ years. That includes pairing BSCs with chemical-resistant countertops, epoxy drying racks, and vibration-free balance tables.
If you're planning a cabinet upgrade or integrating one into a full lab setup, this guide will help you choose with confidence and get the support infrastructure right, too.
What Is a Biological Safety Cabinet (BSC)?

A biological safety cabinet, or BSC, is a ventilated workspace that filters air to protect lab personnel, the surrounding environment, and the materials being handled. If your work involves infectious agents or hazardous particulates, a BSC is not optional; it’s a non-negotiable piece of containment infrastructure.
BSCs use HEPA filtration, controlled airflow, and specific cabinet design to create a barrier between the user and the biological material. The goal is simple: reduce exposure, prevent contamination, and maintain a clean, safe environment, especially in BSL-2 and BSL-3 labs, where the stakes are higher.
A common point of confusion we see is the difference between a BSC and a clean bench. A clean bench (also called a laminar flow hood) blows HEPA-filtered air toward the user, which protects the product, but does nothing for the person working. BSCs, on the other hand, are designed to keep the user safe by drawing contaminated air away from the operator before filtering and exhausting it.
If you’re equipping a lab space and debating between a laminar hood or a safety cabinet, always start with this rule: if there's even a chance of biological exposure, you're in BSC territory. And if you're updating your infrastructure alongside it, make sure you're matching it with chemical-resistant countertops and pegboards that support the same level of safety and performance.
BSC Classifications: Class I, II, and III Explained

Every biological safety cabinet falls into one of three main classes: I, II, or III. These categories are not technical labels; they determine how your lab manages airflow, what kind of biohazards you can handle, and how well your staff and environment are protected. Choosing the right class is step one in getting your lab safety setup right.
Class I Cabinets
Class I BSCs are the most basic form of protection. They use inward airflow to protect the user and a HEPA filter to protect the environment, but they don’t shield the product inside. That means anything you're working on remains exposed to possible contamination.
You’ll find Class I cabinets in teaching labs or diagnostic environments handling low-risk agents under BSL-1 or BSL-2 conditions. If your focus is primarily technician safety and not sterile sample handling, this is a cost-effective and code-compliant option. The airflow design is closer to a fume hood, but with one critical upgrade: HEPA-filtered exhaust.
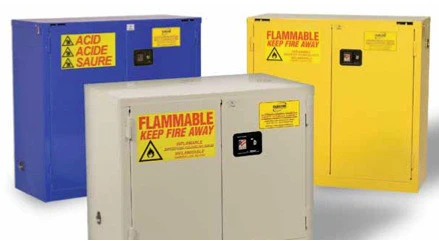
If you’re pairing this with surrounding infrastructure, remember: these still need chemical-resistant countertops because spills, splashes, and residue can happen in any lab.
Class II Cabinets
This is where most of the lab world lives. Class II cabinets offer triple protection: personnel, product, and environment, which is why they make up the majority of BSCs installed today. They're ideal for microbiology, sterile drug compounding, and BSL-2/BSL-3 work involving infectious materials.
If you’re wondering why Type A2 cabinets account for 90% of installations, the answer is simple: they’re reliable, energy-efficient, and don’t require external ducting. That makes them easier to install in both new builds and retrofits, especially for schools and academic labs upgrading their setups during summer closures.
Subtypes of Class II Cabinets: A1, A2, B1, B2, and C1
-
A1 vs. A2: A1 is mostly phased out today due to airflow design limitations. A2 adds better containment by introducing a plenum of recirculated, HEPA-filtered air, making it safer and more adaptable.
-
B1 and B2: These are ducted cabinets. B1 splits exhaust and recirculation for work involving minimal chemicals. B2 exhausts 100% of air and is ideal for toxic vapors or radionuclides, but they’re expensive to run and more complex to install.
-
C1: A newer hybrid model. It operates like an A2 but can switch to ducted B mode when needed.
User question we often get: Is there an advantage to C1 over B2 in pharma labs?
The answer? Yes, C1 cabinets offer flexibility without the constant ducting load, which is a cost-saver in multi-purpose facilities.
Need to place a C1 or B2 cabinet near a sink or wash station? Make sure you're matching it with custom stainless or epoxy countertops rated for chemical resistance and easy decontamination.
Class III Cabinets
Class III is the top of the containment line. These are gas-tight gloveboxes with a full-seal design, reserved for BSL-4 labs and high-risk agents like Ebola or smallpox. Negative pressure ensures any breach pulls air inward, and all air is double HEPA-filtered.
They're rare, expensive, and built for niche environments, but when you need one, you know it.
Comparing Biological Safety Cabinets to Other Containment Options
If you're outfitting a lab or evaluating upgrades, it’s easy to mix up biological safety cabinets with similar-looking equipment. But understanding the differences between BSCs, fume hoods, and laminar flow cabinets is critical for safety and compliance, and it often influences how you design your entire workspace.
A biological safety cabinet (BSC) is engineered to protect three things: the user, the product, and the environment. It accomplishes this using carefully directed airflow and HEPA filtration, a level of control that's required for handling infectious materials or sterile samples in BSL-2 and BSL-3 labs. (We’ve helped dozens of schools and lab planners make the right match here, especially when designing around existing plumbing, exhaust lines, or custom epoxy resin countertops.)
A fume hood, on the other hand, is meant for chemical containment. It uses high-velocity exhaust to sweep harmful vapors away from the user. There’s no filtration, it’s all about rapid removal. Fume hoods don’t protect the product and are not meant for biological samples.
Then there’s the laminar flow cabinet, sometimes mislabeled as a BSC. These provide filtered air directly over the work surface, but blow it outward toward the user. That keeps the materials sterile but leaves the person vulnerable. These are great for electronics or pharmaceutical filling, but never for anything biohazardous.
If you’re still unsure which unit fits your workflow, our quote request system allows you to upload sketches and get custom-fit recommendations, plus options for paired lab sinks and balance tables if needed.
Considerations: Airflow, Safety, and Maintenance
Buying the right biological safety cabinet is only part of the equation. Using it correctly and maintaining it over time is where lab safety is won or lost. Whether you’re managing a single cabinet in a high school or multiple units in a BSL-3 research lab, airflow and routine maintenance are non-negotiables.
How HEPA Filtration Works
HEPA filters are the heart of every BSC. They trap airborne particles down to 0.3 microns with 99.97% efficiency, which is why they're essential for both incoming air (to protect the product) and exhaust air (to protect the lab).
In most Class II and III cabinets, these filters are built into both the intake and exhaust systems. When it’s time to replace them, certified technicians use a bag-in/bag-out procedure that minimizes contamination during removal.
Is HEPA filter replacement safe to DIY?
Our take?
No. Not even close. Filter changes involve biohazards, pressure zones, and potential exposure risks. Always go with a certified BSC technician who understands NSF/ANSI 49 compliance and local ventilation codes.
Monitoring Airflow and System Wear
BSCs rely on a precise balance of airflow. Too much inflow? You risk turbulence. Too little? Containment fails. That’s why airflow monitoring is built into most modern cabinets.
Newer models now come with self-regulating fans that ad speed automatically based on airflow conditions. It’s a feature worth looking for, especially in shared lab environments or teaching facilities where cabinets get frequent use.
If you're placing cabinets near water sources or sinks, plan your layout using moisture-resistant epoxy or stainless steel countertops that won’t degrade over time.
Maintenance Best Practices
Keeping a BSC clean and certified doesn't need to be overwhelming; it needs to be consistent. Start with daily wipe-downs using alcohol or bleach, and schedule deeper cleanings weekly or after any contamination event.
Each cabinet must be inspected and NSF 49 certified annually. This ensures your airflow, filters, and containment are performing to spec. If you're relocating a cabinet, even within the same room, it also requires full decontamination and recertification.
Should clean benches run continuously?
For true BSCs, yes, airflow should remain on during use and often for a purge period afterward. For clean benches (not biological safety cabinets), constant running is not a safety necessity, but keeping it on can reduce particulate buildup.
Planning a new install or equipment relocation?
Use our Request a Quote tool to flag cabinets, surfaces, and accessories that might need to move together. It streamlines your next step.
Which Biological Safety Cabinet Is Right for You?
The best biological safety cabinet for your lab depends on two things: the biosafety level of your work and the environment you're working in. Whether you’re dealing with BSL-1 teaching exercises or BSL-3 diagnostics, choosing the wrong BSC puts safety, compliance, and productivity at risk.
Match by Biosafety Level (BSL)
Understanding your lab’s biosafety level is the first step in choosing the right BSC:
-
BSL-1 and BSL-2: Class I or Class II A2 cabinets are the go-to here. These offer the protection needed for most classroom, clinical, or academic work involving agents like E. coli or Salmonella. We often see schools pair Class II A2 models with our epoxy resin countertops and lab drying racks, creating a full system that supports daily use without wearing down.
-
BSL-3: For more advanced work, like tuberculosis or SARS-CoV, Class II B1, B2, or the newer C1 cabinets are needed. These units handle volatile chemicals and higher-risk pathogens. Our clients in this category frequently request custom phenolic resin surfaces for added durability and chemical resistance, especially in spaces with multiple containment zones.
-
BSL-4: Only a Class III cabinet is acceptable at this level. Fully sealed and glovebox-style, these are used in facilities handling Ebola, Marburg, or other high-consequence pathogens. This type of install usually goes hand-in-hand with stainless steel balance tables and built-in decontamination zones.
Match by Application
Even within the same biosafety level, the right BSC changes depending on how you're using it.
-
Clinical labs often use Class II A2 or B2 models for daily specimen handling. Many pair these with drop-in sinks for integrated rinsing and cleanup zones.
-
Pharmaceutical compounding requires product protection and strict containment. A Class II B2 or C1 may be the right fit, especially when combined with anti-vibration balance tables to keep precision equipment stable.
-
Schools and universities typically lean toward Class I or II A2. These offer strong protection with less installation complexity. We often help school clients optimize tight lab footprints using modular pegboards and compact epoxy sinks that support workflow without blowing the budget.
-
Government or research labs may span multiple use cases. We’ve worked with facilities that require everything from a ducted B2 for volatile drug testing to a basic A2 for sterile prep work, all within the same building. Our quoting tool helps streamline this type of planning, especially when specs change mid-project.
Brand Comparisons: Labconco vs. Thermo vs. Fisher vs. ESCO
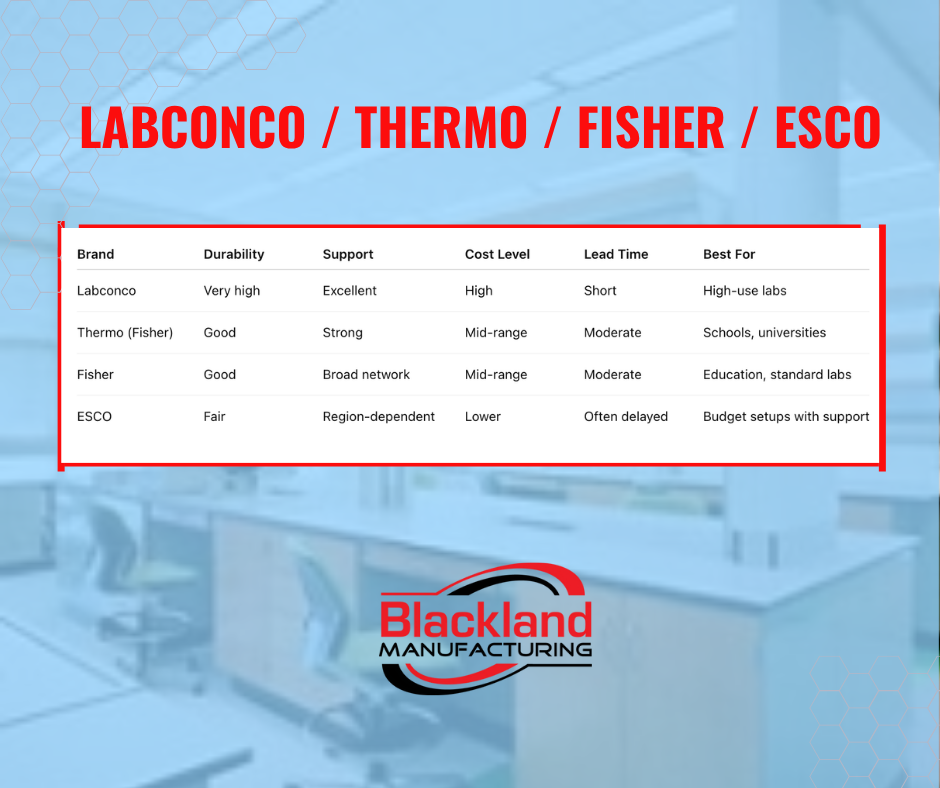
Not all biological safety cabinets are created equal, even when they fall into the same classification. For many lab planners, the next big question after choosing the right type is: Which brand should we trust? The answer depends on your priorities: durability, cost, support, and long-term maintainability.
Labconco
Labconco is widely regarded as one of the most durable options on the market. Their build quality and filter integrity are consistently praised by technicians and researchers.
Labconco is more durable but expensive.
We’ve seen these units hold up for over a decade in high-use teaching labs. But with that longevity comes a higher upfront cost.
Is the extra cost of Labconco worth it?
If your lab runs daily and you don’t want to think about replacements or service contracts anytime soon, the answer is yes.
Fisher Scientific (Thermo Scientific)
Fisher BSCs (often branded under Thermo Scientific) are a solid mid-range option. They're easier to source and come with reliable filtration and electrical components.
Fisher BSCs can run for tens of thousands of hours.
Many of our school and university clients start with Fisher because it offers a good balance of price, availability, and performance. These models integrate easily with standard epoxy countertops and are compatible with most modular pegboard layouts.
ESCO
ESCO cabinets are often selected for their lower price point and flexible options. But the tradeoff tends to come in the form of support and replacement logistics.
ESCO parts are proprietary and slow to ship.
That’s been echoed in our experience, too, especially for clients in rural or budget-sensitive areas who find out too late that service parts can take weeks to arrive. We recommend ESCO only if you're in a region with strong distributor support.
If you’re still weighing your options, our quoting process makes this part easier. Whether you're working with an architect or managing a campus upgrade solo, we can walk you through not the cabinet selection, but how to pair it with balance tables, sinks, and work surfaces that fit your specific space and code requirements.
How We Support BSC Buyers
Choosing the right biological safety cabinet is only part of the equation. What happens around it, your countertops, sinks, pegboards, and layout, determines whether the cabinet works for your lab. That’s where we come in. We help planners, architects, and educators build smart lab environments that keep people safe and work flowing smoothly.
Full Lab Integration
We don’t sell BSCs. But we make them work better by supplying the things they connect to.
That includes:
-
Epoxy or phenolic resin countertops that stand up to harsh chemicals, spills, and repeated cleaning
-
Matching lab sinks for integrated cleanup
-
Pegboards that dry glassware and tools without degrading
-
Balance tables that reduce vibration near sensitive BSC applications
Whether you're specifying a new Class II cabinet or upgrading an older unit, the right surfaces and accessories matter. And that’s exactly what we help with.
Free Pegs and Maintenance Accessories
Every lab drying rack we ship comes with free polypropylene pegs, and we include free replacement pegs for one full year. That’s not a marketing gimmick. It’s how we help you maintain uptime without scrambling to order parts mid-semester.
Need extras down the road? You can find them anytime in our replacement pegboard parts section, no strings attached.
LEED-Certified Surface Options
We work with materials that support sustainable building projects:
-
Our epoxy resin countertops include 10% recycled content and can contribute to LEED MRc4 and MRc5 credits.
-
Our phenolic resin options use rapidly renewable resources and qualify for MRc6 credits.
-
Both options also support air-quality goals when combined with low-VOC adhesives and finishes.
If you’re involved in a green-certified construction project or working with a LEED consultant, we’re happy to help match materials to credit pathways.
Custom Quotes with Hand-Drawn Sketches
We’ve been doing this long enough to know that sometimes all you have is a napkin sketch or a rough layout PDF. That’s enough. We turn sketches into fully priced, build-ready quotes, no generic forms or pushy salespeople involved.
This is especially helpful for schools, contractors, and designers managing multiple moving parts. Upload your file via our Request a Quote page, and we’ll take it from there.
Timing and Budget: When to Buy or Upgrade Your BSC
In our world, timing is not a detail; it’s a deadline. For many schools, universities, and institutional labs, summer is the only window to get serious work done. That’s why the spring quoting season is our busiest time of year. If you’re planning to install or upgrade a biological safety cabinet, March through May is the moment to get your specs and layouts in order.
We work closely with schools and contractors who need to finalize drawings and quotes fast, often before fiscal-year cutoffs or facility shutdowns. If your BSC is being relocated, upgraded, or added to a newly renovated space, we help coordinate the surrounding infrastructure too, like matching countertops, epoxy sinks, and custom drying racks that align with your new layout.
And because we don’t operate like a traditional distributor, we move faster.
We don’t have employees. That’s not a liability, it’s why our quoting, coordination, and order fulfillment is faster, leaner, and more cost-efficient than companies three times our size.
If your cabinet project is on a compressed schedule, or if you’ve been burned by long lead times before, use our Request a Quote page early. We’ll help you get the parts moving before your deadline hits.
4 Common Mistakes to Avoid When Choosing a BSC
Biological safety cabinets are often chosen by people who don’t use them, and that’s where mistakes creep in. Whether it’s an architect trying to meet code or a school admin rushing to use grant funds, getting one detail wrong can compromise the entire lab setup. Here’s what we see most often, and how to avoid it.
1. Misunderstanding Airflow Types
This one’s the biggest. Not all cabinets move air the same way, and using the wrong model can leave you unprotected. We’ve seen labs install Class I units when they needed a ducted Class II B2, all because it looked similar. If you're unsure, we recommend starting with your biosafety level and cross-referencing cabinet type before any purchase.
2. Assuming Clean Benches Offer User Protection
Clean benches (laminar flow hoods) are often mistaken for BSCs, especially by non-lab personnel. The truth is: they protect the sample, not the person. If you're working with anything infectious, even at BSL-1, a clean bench is the wrong choice.
We’ve helped multiple labs replace benches that were installed by mistake, with all the downstream rework that comes with it. If your facility is unsure, send us your setup and we’ll help confirm the right classification before quoting surfaces or sinks.
3. Using General-Purpose Countertops in Biohazard Zones
It’s tempting to use whatever surface is already in place, but standard laminate or particleboard breaks down fast under repeated cleaning and exposure to bleach or alcohol.
We recommend epoxy resin countertops or phenolic resin surfaces, depending on your chemical load and layout. These materials are built for lab conditions and for the types of disinfection BSC work requires.
4. Choosing the Wrong Brand and Getting Stuck
User mistake: Bought the wrong brand and can't get parts.
This one hurts. A cabinet is only as good as the support behind it. We’ve had clients come to us mid-semester because their ESCO unit needed a proprietary part, with a 6-week wait.
If reliability is critical and your maintenance budget is tight, we suggest looking at brands like Labconco or Thermo, which we’ve seen hold up better under use.
What I’d Do If I Were Outfitting a Lab Today
If I were setting up a lab from scratch or upgrading one that’s been limping along, I’d keep it simple and strategic. Here’s exactly what I’d do.
I’d start with a Class II A2 cabinet. It’s the most adaptable for general use, doesn't require ducting, and covers BSL-1 and BSL-2 workflows. Unless you're dealing with volatile chemicals or doing pharma compounding, this type fits almost every educational or clinical lab.
Then, I’d verify the brand’s lead times and service network. If it takes six weeks to get a replacement part or the tech support line never picks up, that cabinet is not saving you time; it’s costing you time. I’d lean toward Labconco or Thermo for exactly that reason.
Next, I’d make sure the work around the cabinet is as tough. That means pairing it with epoxy or phenolic resin countertops, lab sinks, and pegboards that can handle chemical spills, high heat, and repeated disinfection without breaking down. It’s not about bells and whistles, it’s about not having to replace anything for 10 years.
I’d time my purchase right. Spring is when labs plan for summer installs, and waiting until June puts you at the back of the line. Get your quotes and drawings in early.
And finally, I’d work with a vendor who supports the project, not the product. Someone who can answer questions, look at your layout, and help you think through what happens before and after the cabinet arrives. That’s what we do here every day.
If you’re outfitting a lab and want to get it right the first time, send us your drawing, even if it’s a pencil sketch. We’ll help you spec the right surfaces, drying racks, balance tables, and accessories to match the cabinet you’re investing in.